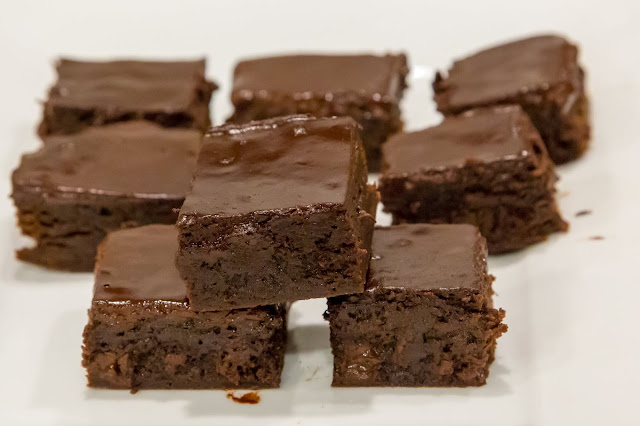
In my house chocolate is basically always an appropriate choice. Whether you are celebrating, mourning, or having a stressful or happy day, I think it is hard to go wrong with chocolate. So it is not surprising I have (at least) two basic brownie recipes in my regular rotation. I've previously posted the chewy brownie recipe which lives up to its name, yielding a brownie that also gives your jaw a work out. But more commonly these days I fall back on this fudgy frosted brownie. I used to think frosting on brownies was unnecessary; but after creating this simple pour on glaze, I've realize my previous opinion was based on me being lazy. This glaze is fast and easy to make, and increases the deliciousness. So in today's quarantine kitchen I present to you my fudgy brownie - with optional modifications to add chai or mocha flavors.

The Fudgy (chai/mocha optional) brownie
Makes 20 x 1 inch brownies
50 grams bittersweet chocolate (I usually use 72% or 85% - pick something you like to eat!)
113g (1/2 cup) unsalted butter
1 1/2 cups sugar
2 eggs
113g (1/2 cup) unsalted butter
1 1/2 cups sugar
2 eggs
½ cup cocoa powder
1/2 teaspoon salt
2 teaspoons vanilla
1 cup flour
Optional chai seasoning:
1/2 teaspoon salt
2 teaspoons vanilla
1 cup flour
Optional chai seasoning:
2 tsp cinnamon
1 tsp cloves
½ tsp all spice and ginger
Glaze:
¼ cup milk (any percent) or cream
100 grams bittersweet chocolate coarsely chopped
2-4 tablespoon hot espresso/coffee to taste (optional, can replace with milk)
Make the brownies:
1. Preheat oven to 175c (350f). Prepare a 9x9 pan, lining it with a strip of parchment that goes up two of the sides.
2. In a pot (2 quart) melt the chocolate and butter over low heat, stirring frequently to blend and avoid burning.
3. Remove pot from the heat and stir in the sugar till it is well blended. Mix in the eggs, salt, vanilla and cocoa, followed by the flour and chai spices (if you are using these).
4. Bake for 35-45 minutes. If you want brownies on the fudgier/decadent side - a toothpick should come out with slightly uncooked crumbs. For a more traditional brownie cook until a toothpick comes out mostly clean.
5. Cool on a wire rack.
After taking the brownies out of the oven make the glaze:
1. In a small bowl warm up milk and chopped chocolate in the microwave (in 2 x30 second increments so as not to burn chocolate).
2. Add in hot coffee/espresso (optional, can replace with milk). Let sit for 1 minute to allow chocolate to melt. Use a whisk and stir till mixture is smooth. Note initially this looks separated, then if you keep whisking it should come together - but it will be fairly liquidy!
3. Pour over the hot brownies. The glaze will partially be absorbed into the hot brownies - this is ok!
Let cool. Lift from pan by pulling on edges of parchment paper. Cut into small squares (these are rich!)